
In This Article
It’s late October in Canada, and the first skiff of snow is about to turn your glossy bike path into a hockey rink with commuters. If you’re weighing a studded vs non-studded fat tire e-bike setup, the stakes are higher than they look. A motorized bike weighing 30 kg or more (65 lb-plus) on black ice is a physics problem, and your collarbone is the variable.
Here’s the honest framing. I haven’t ridden these products, and I won’t pretend otherwise. What follows comes from real spec sheets, retailer listings, owner-forum threads and winter-cycling research, translated into plain buying logic. Where review pools are thin, I say so. Where a product isn’t reliably stocked on amazon.ca, check current availability before you commit.
Winter riding is hardly a fringe hobby. Cold-weather biking has its own culture and gear, and one Calgary writer cited there estimates that about 30 to 40 per cent of cyclists ride year-round.
What Is a Studded vs Non-Studded Fat Tire E-Bike Setup?
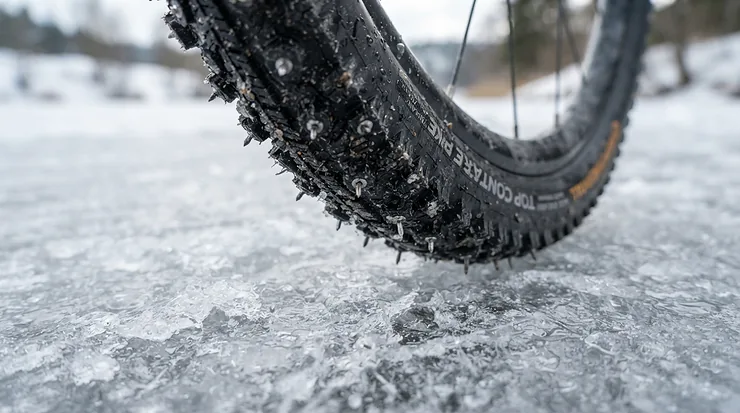
A studded vs non-studded fat tire e-bike comparison weighs tires with embedded carbide or steel studs against rubber-and-tread-only tires. Studs bite into ice for grip. Non-studded fat tires, typically 4 in. (10 cm) wide or more, float over snow, roll quieter, and cost less to run on dry pavement.
Quick Comparison: Studded vs Non-Studded Fat Tire E-Bike Picks at a Glance
| Product | Studs | Size | Price range (CAD) | Review picture | Best For |
|---|---|---|---|---|---|
| 45NRTH Dillinger 5 | 258 carbide studs (studded build) | 26 x 4.6 | ~C$300-C$400 per tire | Positive, small pool | Riders on glare ice |
| Schwalbe Al Mighty | Studded or stud-ready | 26 x 4.8 | ~C$240-C$320 per tire | No independent pool found | Heavy e-fatbikes, deep snow |
| CST Toboggan | Pre-studded | 26 x 4.0 | Around C$200 | 3 reviews, all positive | Budget studded setup |
| Mokwheel Studded Winter Tire | Studded (count not listed) | 26 x 4.0 | ~C$100-C$150 per pair | Brand listing only | Matching Mokwheel bikes |
| Vee Tire Co. Snow Shoe | Stud-ready, none fitted | 26 x 4.8 | ~C$100-C$200 | Limited data | Starting non-studded, studding later |
| Kenda Juggernaut | None | 26 x 4.0 | ~C$75-C$160 per tire | Thin and mixed | Plowed roads, dry pavement |
| Norco Bigfoot VLT | Complete bike (add studs) | EP8 mid-drive | Premium tier | Positive owner reports | Serious winter trails |
Look at the table this way: the CST Toboggan and Mokwheel Studded Winter Tire are the cheapest ways to get real studs under you, while the 45NRTH Dillinger 5 is what you pay for when ice is your daily reality. The Kenda Juggernaut and Vee Tire Co. Snow Shoe serve riders who’d rather decide on studs after seeing how their winter behaves. Remember that review pools are small across the board, so treat every rating as a hint rather than a verdict.
💬 Just one click helps others make better buying decisions too! 😊
Top 7 Studded vs Non-Studded Fat Tire E-Bike Picks: Expert Analysis
1. 45NRTH Dillinger 5 — the ice-grip benchmark
Studs are the whole pitch. The studded version of the 45NRTH Dillinger 5 carries 258 concave, carbide-tip aluminum studs across a 26 x 4.6 in. casing (about 117 mm wide), a lot of tiny crowbars aimed at the ice.
Taller side lugs and a tubeless-ready bead sound like catalogue talk, but they mean steadier cornering on rutted snow and the freedom to run lower pressures without burping air. The 60 tpi build is listed at roughly 1.75 kg (3.9 lb) per tire. That’s rotating mass you’ll feel in every acceleration, though a motor hides most of it. Listed maximum pressure sits near 30 psi.
Based on the spec comparison, this is for riders who meet genuine glare ice every week, not the occasional frosty patch. One caution: a Canadian retailer’s listing for the sibling Dillinger 4 says it isn’t recommended for power-assist bikes, because motor torque and weight can cause premature stud loss. I couldn’t find that warning for the 45NRTH Dillinger 5, but confirm with 45NRTH before pairing it with a high-torque mid-drive.
Reviewers on retailer pages rate it highly, though the pool I found is small and mostly non-motorized fat-bike riders.
Pros:
- ✅ Dense stud count for serious ice
- ✅ Braced side lugs aid cornering
- ✅ Tubeless-ready for low-pressure riding
Cons:
- ❌ Highest price in this lineup
- ❌ E-bike suitability needs confirming
Expect roughly C$300-C$400 per tire; fair value only if ice is your daily reality.
2. Schwalbe Al Mighty — e-bike rated with monster flotation
Width is the story. The Schwalbe Al Mighty is a 26 x 4.8 in. (122 mm ISO) tubeless tire sold either studded or with stud-ready blocks, so you can choose your commitment level.
It carries an E-25 rating, meaning Schwalbe has engineered the casing for e-bike loads. Its Super Ground casing and Addix Speed Grip compound target low-temperature grip, and the long leading edges in the transition and shoulder zones are meant to sharpen steering response. E-25 generally corresponds to assist up to 25 km/h, while Canadian bikes may assist to 32 km/h. That’s another reason to ride slower on ice regardless of what your display allows.
Here’s what to weigh: this tire suits heavy e-fatbikes that spend winter in deep, loose snow, where the extra width spreads your load like a snowshoe. I found no independent review pool, so everything here rests on the spec sheet and Schwalbe’s reputation, not owner anecdotes. A 122 mm tire also demands real frame and fork clearance, so measure before ordering.
Pros:
- ✅ E-bike rated casing construction
- ✅ Huge flotation in loose snow
- ✅ Studded or stud-ready options
Cons:
- ❌ Needs generous frame clearance
- ❌ No independent reviews found
Plan on about C$240-C$320 per tire; solid value for heavy bikes in deep-snow country.
3. CST Toboggan — factory-studded without the premium price
Convenience is the hook. The CST Toboggan arrives pre-studded in 26 x 4.0, the size on many mainstream e-fatbikes, so there’s no studding tool, no weekend of thumb-wrecking, and no guesswork.
A Canadian e-bike retailer lists it around CA$199 with a short lead time, and customer feedback there is positive. The three reviewers, including one from Yellowknife, report good traction on ice and packed snow, and one says they ride twelve months a year thanks to these tires. That’s a tiny sample, so read it as encouraging rather than conclusive. A forum commenter also suggests CST uses a thicker casing than many older fat tires, which could help stud retention. That’s an opinion, not a lab result.
The honest take: this is a sensible first studded purchase for commuters who want ice insurance without premium money. What the listing doesn’t tell you is the stud material and count, which matters for long-term wear (more on that below).
Pros:
- ✅ Comes pre-studded and ready to ride
- ✅ Fits common 26 x 4.0 e-bike rims
- ✅ Reasonable price for factory studs
Cons:
- ❌ Very small review pool
- ❌ Stud specs not clearly listed
Around C$200 range; good entry-level value if you accept the thin review evidence.
4. Mokwheel Studded Winter Tire — fit-matched replacement set
Fit is the angle. The Mokwheel Studded Winter Tire is a 26 x 4.0 pair built for the brand’s own platforms, including the Basalt, Obsidian, Onyx, Tor Plus and Mesa Plus ST models.
The listing promises a cold-resistant rubber compound and deep-tread anti-slip grip. Cold-tolerant rubber matters because ordinary compounds stiffen near freezing and lose the micro-grip you rely on in slush and wet snow. The set includes two tires, which makes it one of the cheapest ways to add studs to a compatible bike.
Here’s the catch: the brand’s own listing is the only source I found. There’s no stud count, no stud material and no independent owner feedback, so I can’t verify how it behaves over a season. Treat it as a practical choice for Mokwheel owners who want a drop-in answer, and an uncertain one for everyone else.
Pros:
- ✅ Sold as a ready-to-fit pair
- ✅ Cold-resistant rubber compound
- ✅ Matched to listed Mokwheel models
Cons:
- ❌ Stud specifications not published
- ❌ No independent reviews found
Roughly C$100-C$150 per pair at time of research; value depends entirely on how the studs hold up.
5. Vee Tire Co. Snow Shoe — non-studded now, studs later
Flexibility defines it. The Vee Tire Co. Snow Shoe in 26 x 4.8 doesn’t ship with studs, but it’s moulded with holes that let you add them yourself, a “try before you commit” path.
A Canadian retailer describes it as suited to wet, dry and the thickest winter conditions. That makes it the classic non-studded starter: ride it on snow and cold pavement first, then add studs if your route proves icier than expected. The 4.8 in. width gives serious float, and the stud-ready holes keep your options open.
Practical reasoning: this suits riders whose winter is unpredictable, say a Prairie commuter facing chinook thaws and flash freezes in the same week. Remember that studs and an insertion tool generally cost extra and take patience to install. I found limited review data, so I’m leaning on the retailer’s description and the general behaviour of stud-ready designs.
Pros:
- ✅ Stud-ready design keeps options open
- ✅ Wide 4.8 in. flotation
- ✅ Handles wet and dry conditions
Cons:
- ❌ Studs cost extra later
- ❌ Limited review data available
Expect about C$100-C$200; good value for the undecided.
6. Kenda Juggernaut — the stock non-studded baseline
Familiarity is the draw. The Kenda Juggernaut in 26 x 4.0 is the tire many popular e-fatbikes ship with, and listings note fitment on Aventon, Rad Power and Himiway models. The wire-bead version is listed near 1,285 g (about 2.8 lb).
One forum owner who ran it alongside new studded CSTs called the Juggernaut light with good traction on all surfaces except ice and icy hardpack. That sums up the non-studded argument in one sentence. On plowed roads, dry pavement and mixed slush, it’s cheap, light and quiet. On glare ice, it’s a rubber sled.
Ratings are scattered. One retailer page shows a very low average based on a single review, which says more about sample size than quality. The advice here is to treat the Kenda Juggernaut as a baseline, not a winter solution, and to pair it with careful route choices.
Pros:
- ✅ Light and inexpensive to replace
- ✅ Wide e-bike fitment support
- ✅ Quiet on dry pavement
Cons:
- ❌ Weak on ice and icy hardpack
- ❌ Reviews thin and inconsistent
Around C$75-C$160 per tire; best value if your winter is mostly plowed.
7. Norco Bigfoot VLT — a Canadian brand’s winter-trail mid-drive
Torque is the headline. A 2023 owner of the Norco Bigfoot VLT (VLT1 trim) reports a Shimano EP8 motor with 85 Nm of torque and a 900 Wh battery, a combination aimed at snowy singletrack rather than gentle path cruising.
Why that matters for studs: a mid-drive pushes through the rear tire, so loose or icy climbs reward a rear tire that can bite. That makes the studded vs non-studded fat tire e-bike question sharper on this bike. Riders in Alberta have discussed adding studded tires to it, and one forum owner who runs studs on an e-fatbike says icy pavement stretches are easy with them. Norco later added an entry-level VLT S2 for 2024.
Honest limits: those are owner reports, not lab data, and I haven’t verified tire clearance across trims. Dealers, not necessarily amazon.ca, are the likely source, so check availability. Budget separately for studded tires, since the stock rubber isn’t the winter answer.
Pros:
- ✅ Strong mid-drive torque for climbs
- ✅ Large 900 Wh battery (VLT1 owner report)
- ✅ Owners successfully run studded tires
Cons:
- ❌ Premium purchase price
- ❌ Studded tires cost extra
A premium-tier purchase measured in thousands of dollars; check current pricing, and expect strong value only for riders using it hard.
Metal Stud Placement Patterns: Why Layout Beats Stud Count
Spec sheets love stud counts, such as 168, 240 or 258. But metal stud placement patterns matter more than the headline number, because studs only work when they touch ice, and a tire only touches the ground in a small patch.
Consider the 45NRTH Dillinger 5‘s siblings. One listing describes directional centre lugs for rolling speed and braking, plus braced side lugs for cornering. That tells you the studs ride on a layout designed around two jobs: straight-line traction in the middle, lean-angle grip on the shoulders.
| Pattern idea | What it does | Best For |
|---|---|---|
| Centre-weighted studs | Straight-line braking and climbing | Commuters on straight paths |
| Centre plus shoulder rows | Adds grip when leaned over | Mixed trail and road riders |
| Shoulder-dense layouts | Cornering bite on ice | Twisty singletrack |
| Stud-ready custom (Vee Tire Co. Snow Shoe, Schwalbe Al Mighty stud-ready) | You choose the layout | Tinkerers |
Interpreting this: more shoulder studs help when you’re leaned over, but they may touch down less on straight dry roads, which can feel odd. Custom layouts let you shape metal stud placement patterns to your route, though you take on the labour. An old tire patent for cars even specifies placing spikes about 45 to 75 per cent of the way from tread centre to shoulder to improve ice cornering, which hints that shoulders do real work.
Weight deserves a mention too. One listing says 168 large concave carbide-aluminum studs reduce weight while maximizing surface area. Lighter studs help your range and, per car-focused research, reduce pavement wear.
Tire Wear on Dry Pavement: The Hidden Cost Studs Don’t Advertise
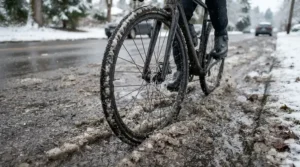
Tire wear on dry pavement is where the studded vs non-studded fat tire e-bike debate gets uncomfortable. According to 45NRTH’s studded tire guide, pavement, rocks and roots can strip studs when the stud’s grip on the surface exceeds its grip in the tire’s pocket. Translation: asphalt tugs, and eventually something gives.
Rider reports are mixed. One forum rider says good carbide-stud tires are fine on dry pavement, just slower and similar to a knobbly. Another suggests pumping the tires firmer to reduce stud contact on dry sections, then lowering pressure for ice. A rider from Ontario puts it bluntly: studs “suck” on dry pavement, the price you pay for control on ice. Car research (not bike research) also found studs give no advantage on bare pavement and can lengthen stopping distances, so treat dry-road braking with respect.
E-bikes add torque to the equation. A retailer note on the Dillinger 4 warns that motor power and weight can speed up stud loss.
The practical fixes:
- Keep a second, non-studded wheelset or tire pair for dry stretches.
- Prefer shoulders and snowy edges when route choice allows.
- Choose carbide studs over cheap alternatives for longer life.
The non-studded Kenda Juggernaut wears too, but it costs less to replace than a premium studded tire.
Cost of Studded Tire Upgrades: What You’ll Really Pay in CAD
Cost of studded tire upgrades climbs quickly because fat tires are large, and you need two. Here’s the landscape at time of research, in ranges only.
| Option | Upfront (CAD) | Ongoing | Best For |
|---|---|---|---|
| Kenda Juggernaut (non-studded) | ~C$150-C$320 per pair | Low | Plowed commutes |
| Mokwheel Studded Winter Tire | ~C$100-C$150 per pair | Unknown stud life | Compatible Mokwheel bikes |
| CST Toboggan | ~C$400 per pair | Moderate | Entry-level studded |
| Schwalbe Al Mighty | ~C$480-C$640 per pair | Moderate | Heavy bikes, deep snow |
| 45NRTH Dillinger 5 | ~C$600-C$800 per pair | Replacement studs extra | Hardcore ice |
The table shows a four-to-six-times spread between the cheapest and priciest studded options. A second wheelset adds cost but saves your good studs from asphalt. For context, a Canadian retailer lists a Kevlar-reinforced Schwalbe Marathon Winter Plus from about C$140 for standard-tire commuters, a reminder that fat tires aren’t your only winter option.
The cost of studded tire upgrades looks different when spread out. A premium pair at roughly C$600-C$800 that lasts several winters works out to a few hundred dollars per season. Budget buyers should weigh stud retention before assuming the cheapest option is the best value.
How to Choose a Studded vs Non-Studded Fat Tire E-Bike Setup: 7 Steps
Choose studs if you regularly meet ice; choose non-studded if your routes are mostly plowed or dry. Here’s the reasoning in order.
- Map your surfaces. Count icy days versus plowed days; studs only pay off on ice.
- Check tire size. Most e-fatbikes take 26 x 4.0 or 4.8, but confirm frame clearance.
- Weigh your motor. High-torque mid-drives load the rear tire harder, so studs matter more there.
- Decide your wear tolerance. Dry-pavement stretches shorten stud life.
- Compare stud quality. Carbide studs typically outlast cheaper alternatives.
- Consider stud-ready tires. A Vee Tire Co. Snow Shoe keeps your options open.
- Budget a second set. Spare wheels protect your investment.
Studded vs Non-Studded Fat Tire E-Bike: Head-to-Head Comparison
| Factor | Studded | Non-studded |
|---|---|---|
| Ice grip | Excellent | Poor to fair |
| Packed snow | Very good | Good |
| Dry pavement | Noisy, slower, more wear | Quiet, efficient |
| Weight | Heavier | Lighter |
| Upfront cost | Higher | Lower |
| Best For | 45NRTH Dillinger 5, CST Toboggan | Kenda Juggernaut |
One Canadian retailer’s own comparison rates standard summer tires poor on ice, Kevlar winter tires good for cold slushy routes, and studded fat tires excellent on packed snow and black ice. Swedish research from VTI found studded tyres improved ice grip and braking stability versus regular bicycle tires, with a big difference between types of studded tyres. Those tests ran near freezing, so don’t assume the same margin in every condition.
My read: studs are insurance. If you never meet ice, you’ve bought noisy, expensive insurance. If you meet it twice a week, the premium disappears the first time your front wheel stays under you.
Canadian E-Bike Rules, Safety and Studded Tires: What to Check
Tires don’t change your legal status, but your bike does. Quebec’s SAAQ electric bike page states that a bike’s motor can’t exceed 500 watts and must stop assisting at 32 km/h to travel on public roads. Most provinces use similar definitions, though age minimums, helmet rules and licensing vary, with Quebec adding a compliance label.
Two safety points matter for winter:
- Ice makes 32 km/h unrealistic. The Schwalbe Al Mighty‘s E-25 rating is a reminder to ride well under your assist cutoff.
- Torque-hungry bikes like the Norco Bigfoot VLT can spin tires on ice, which is where studs earn their keep.
Check municipal rules for paths, too. Helmets are mandatory in many provinces, and a studded tire doesn’t make a fall softer.
Features That Actually Matter (And Those That Don’t)
Matters:
- Stud quality and layout. Carbide tips and sensible placement beat raw counts.
- Casing and compound. Cold-tolerant rubber keeps grip below freezing.
- Correct size and clearance. A tire that rubs is a tire you’ll hate.
Doesn’t (much):
- The biggest stud number. More isn’t automatically better.
- Aggressive marketing words. “Ultimate” tells you nothing.
- Extra width beyond your frame. Without clearance, it’s wasted.
Common Mistakes When Buying Studded vs Non-Studded Fat Tire E-Bike Setups
- Studding for a snow-free commute. If your route is plowed, studs add noise and wear.
- Ignoring torque. Mid-drive power accelerates stud loss on some tires.
- Buying one tire only. Mismatched grip front and rear invites a slide.
- Skipping the spare set. Daily asphalt eats studs.
- Trusting thin reviews. Three reviews are a hint, not proof.
Practical Usage Guide: Setup, Pressure and Your First 30 Days
Mount studded tires with the correct rotation arrow, then run a short break-in. Many riders suggest an easy first ride on dry ground to seat studs, though check your tire’s own instructions. Use sidewall pressure limits (the Dillinger lists about 30 psi) and run lower for ice and snow.
In your first 30 days:
- Lean gently; test cornering on safe, snowy ground first.
- Brake early; studs don’t forgive dry-pavement panics.
- Inspect studs weekly for loss.
- Swap to non-studded rubber when the roads clear.
Real-World Scenarios: Which Setup Fits Your Winter?
The downtown commuter. Eight kilometres on mostly plowed bike lanes with occasional ice. A CST Toboggan pair on the fat e-bike offers affordable insurance.
The trail rider. Frozen singletrack with deep snow. A Schwalbe Al Mighty stud-ready build or 45NRTH Dillinger 5 matches that terrain, and a bike like the Norco Bigfoot VLT matches the demands.
The cautious beginner. Unsure about ice. Start with a Vee Tire Co. Snow Shoe, ride a month, and stud later if needed.
The dry-prairie rider. Cold but rarely icy. A Kenda Juggernaut keeps it simple.
Problem → Solution Guide
Problem: studs wearing fast on asphalt. Solution: add a spare wheelset, raise pressure slightly on dry stretches, and stay on snowy shoulders.
Problem: bike spinning on ice climbs. Solution: lower pressure for more contact and consider a higher stud count on the rear.
Problem: assist cutting out early. According to CBC reporting, power-assisted bicycles can’t exceed 32 km/h on motor power or they become low-speed motorcycles, so that’s by design.
Problem: tire noise. Studs hum on pavement; that’s the trade-off.

FAQ
❓ Can I run studded tires on only the front wheel?
❓ How many studs does a fat tire need?
❓ Can I leave studded tires on all year?
❓ Can I add studs to a non-studded tire?
❓ Are studded tires worth it on plowed roads?
Conclusion
The studded vs non-studded fat tire e-bike question comes down to one honest audit of your winter. If ice is a weekly guest, studs like those on the 45NRTH Dillinger 5, Schwalbe Al Mighty or CST Toboggan buy real control. If your roads stay plowed, the Kenda Juggernaut or a stud-ready Vee Tire Co. Snow Shoe keeps things quiet, light and cheap.
Remember the unglamorous parts: metal stud placement patterns shape how a tire corners, tire wear on dry pavement shortens stud life, and the cost of studded tire upgrades adds up quickly across two wheels and a spare set. Torque-rich bikes like the Norco Bigfoot VLT make traction choices even more important.
Verify current prices and availability before buying, since listings change constantly, and confirm tire clearance and e-bike suitability with the manufacturer.
✨ Ready to ride confidently this winter?
🔍 Click any highlighted product name above to check current pricing and availability, then choose the traction that fits your routes. Your future, ice-proof self will thank you! 🚴♂️
Recommended for You
- Fat Tire E-Bike For Snow: 7 Best Winter Picks In Canada (2026)
- Fat Tire E-Bike For Snow: 7 Best Winter Picks In Canada (2026)
- E-Bike For Grocery Shopping: 7 Best Picks In Canada 2026
Disclaimer: This article contains affiliate links. As an Amazon Associate, I earn from qualifying purchases. If you purchase products through these links, we may earn a small commission at no additional cost to you.
✨ Found this helpful? Share it with your friends! 💬🤗
